iOS Core Animation | From WWDC 2010
Core Animation Architechture
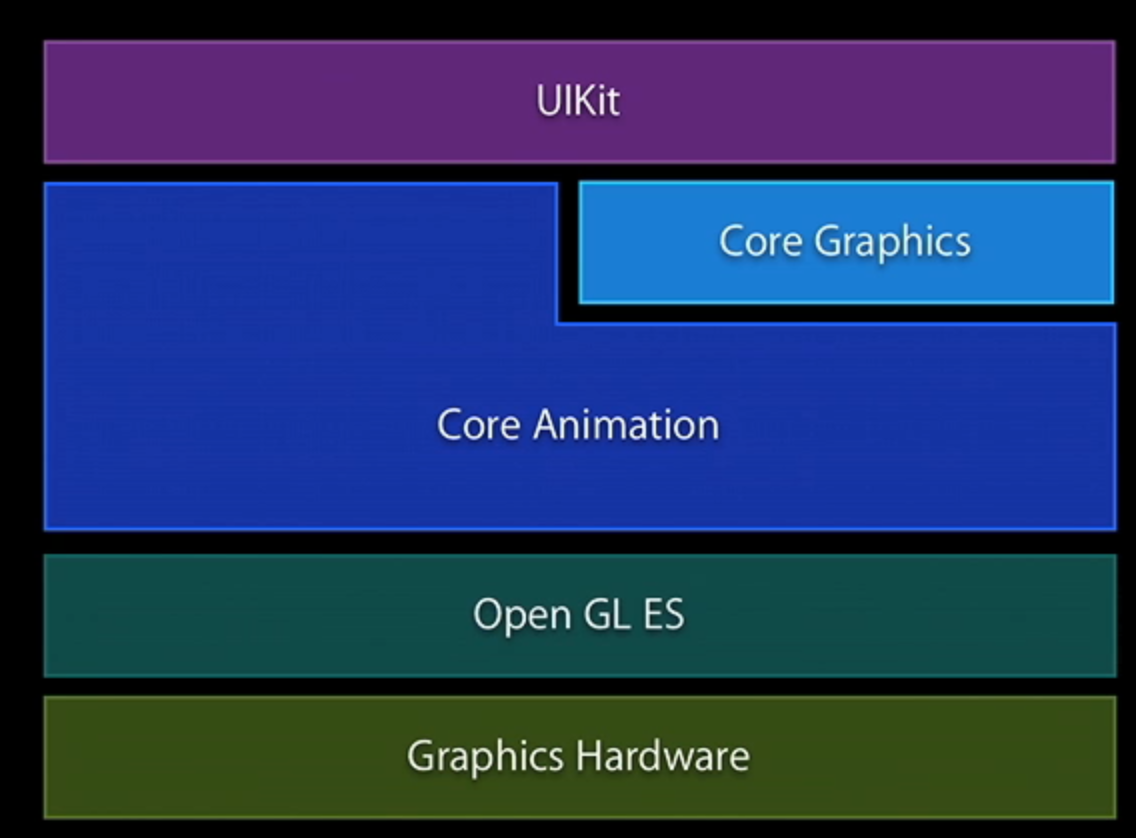
UIKit and Core Animation
- 尽量使用UIKit
- Core Animation?
- Lightweight
- Short-lived
- Benefits of understanding CoreAnimation
- Improve your effectiveness with UIKit animation
- Improve app’s performance
CoreAnimation Basic
- layer
- Animatable properties
- Declarative model

- Creating Layer
#import <QuartzCore/QuartzCore.h>

CALayer* layer = [CALayer layer];
layer.bounds = CGRectMake(0,0,w,h);
layer.position = CGPointMake(30.0,67.0);
layer.content = calogo;
[self.layer addSubLayer:layer];
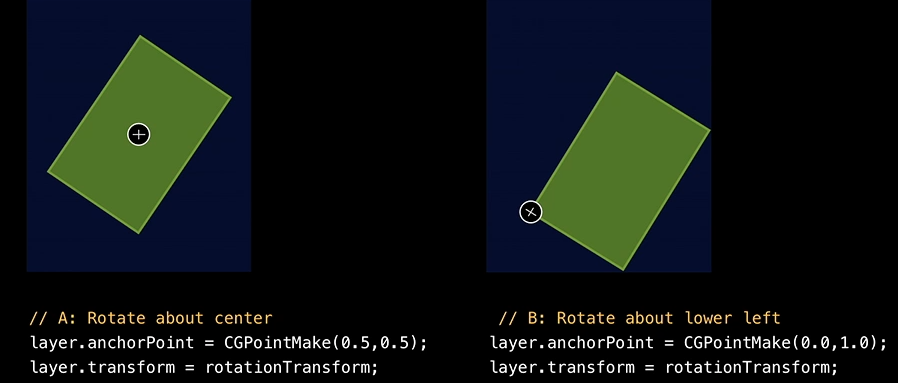
- 几何关系
- bounds : CGRect
- position : CGPoint(super layer coordinates)
- transform : CATransform3D
- anchorPoint: CGPoint
Providing Layer Content
使用CoreGraphics
- 使用delegate,实现
drawLayer:InContext: - 继承CALayer,复写
drawInContext
Implicit animation
- CATransaction:
- runloop中自动执行CATransaction:
myLayer.position = somePt;这种情况是没有动画的。 - All animations during next run-loop
-
CATransaction class - Duration - Timing Function - Implicit or explicit
- Animatable properties:
- Position
- Opacity
- Shadow
- Transform
- Bounds
- And more
Explicit Animations
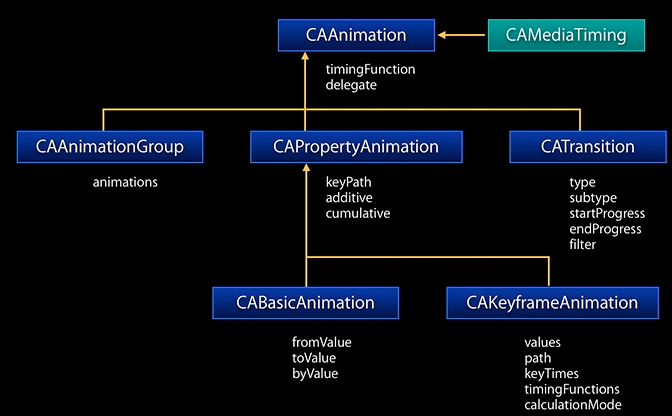
- Which property?
- Use keyPath
@"position"@"position.y"@"position.x"
-
Animation = [CABasicAnimation animationWithKeyPath:@""]; - Add to Layer
[layer addAnimation:animation]
- 注意,layer的Model Value(例如layer的position)没有改变,当动画结束后,下一个runloop到来时,layer会回到原来的位置
- Use keyPath
Presentation Layer
- Model Layer是不会改变的
- 获取layer实时位置需要通过presentationLayer
Drop Shadows
New APIs for more efficient shadows
- 高性能的shadow效果API
@property CGPathRef shadowPath
- 定义Layer中透明的部分
- 缓存shadow的bitmap
self.myLayer = [CALayer layer];
self.myLayer.backgroundColor = [UIColor redColor].CGColor;
self.myLayer.bounds = CGRectMake(0, 0, 50, 50);
self.myLayer.position = CGPointMake(self.view.center.x, self.view.center.y);
self.myLayer.shadowOpacity = 0.5;
self.myLayer.shadowRadius = 10;
self.myLayer.shadowOffset = CGSizeMake(0, 10);

CGPathRef shadowPath = [UIBezierPath bezierPathWithRect:self.myLayer.bounds].CGPath;
self.myLayer.shadowPath = shadowPath;

[self.view.layer addSublayer:self.myLayer];
Shape Layers
- Most layers use bitmaps to provide their content
- Doesn’t scale well, doesn’t animate well
-
Use a CAShapeLayer with path for scalable/animatable content
- Performance tradeoffs
- Uses little memory
- Uses more CPU to render
- No cost for transparent areas
Bitmap Caching
- Animated UIs on embedded devices can be challenging
- Can now request that a layer subtree is flattened to bitmap,将layer的subtree变成一张bitmap:
layer.shouldRasterize = YES - Bitmap version will be reused when possible
Bitmap Caching Caveats
- 消耗内存
- 当bitmap被放大时,会损失精度,图片会模糊
- 如果缓存没命中,会带来更大的开销
How Do GPUs Work
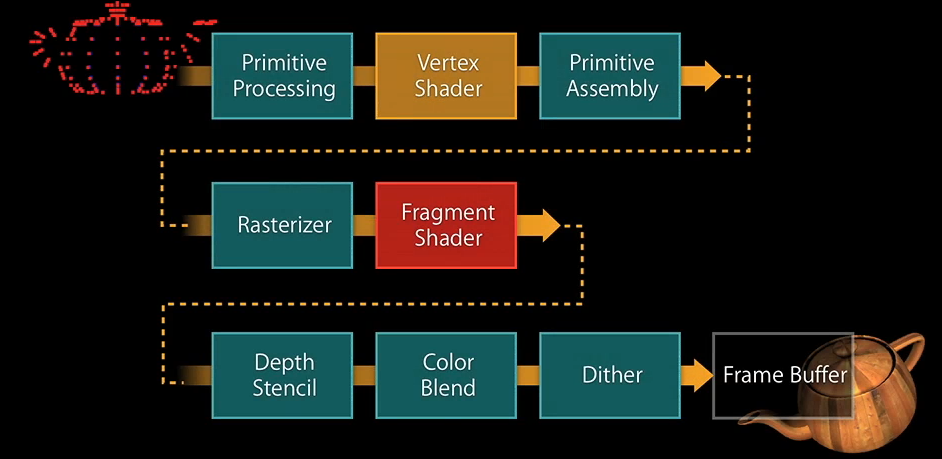
- GPU converts triangles to pixels
- Each is filled with a color or image
- Each can “blend” over background
- Destination can also be an image
How Do We Use the CPU
- CA translates your layers into triangles
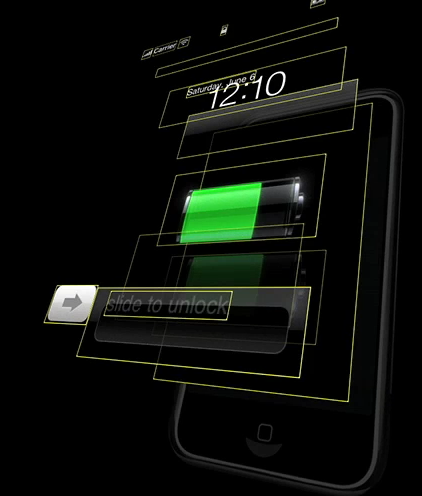
- “backgroundColor” is two colored triangles
- “contents” is two triangles with an image
- Cached or masked layers draw offscreen
GPU Performance Model
- What are teh costs?
- How many destination pixels? 一次最多能渲染多少pixels?
- How many source pixels? 一次最多能读取多少pixels?
- How many times do we switch buffers? 渲染过程中需要多少次switch buffer?
- Too much non-opaque content -> limited by writing bandwidth //半透明,透明的view会影响bandwidth
- Too many large images -> limited by reading bandwidth
- Too many masked layers -> limited by rendering passes
Write Bandwidth
- Minimize alpha-blended pixels
- Ensure opaque CGImageREf’s have no alpha channel
- set
layer.opaque=YESfor layers that draw opaque content
- set
- 如果一个layer包含不透明区域,尽量分离出来单独显示
Read Bandwidth
- Uses images that match screen resolution
- eg. don’t use 1024x768 image for 200x150 layer
Rendering Passes
- Ideally one rendering pass per frame
High DPI
低分的iPhone是320x480,一个点对应一个pixel。在retina屏幕上,当UIWindow创建时,会将1个point变成两个pixel。为了保持UIKit的兼容性,Window还是320x480,layer的contentScale=1。
- 2x scale factor applied to your UIWindow
- All your view geometry remains relative to 320x480
- Use contentScale = 2 for screen-resolution content
- When rasterizing layer,
layer.rasterizationScale=2
- To get back to the native 640x960 viewport
- Use a
scale = 0.5matrix to cancel the implicitscale = 2matrix
- Use a
