ControlNet
How ControlNet works
ControlNet is a neural network architecture designed to enhance diffusion models through the incorporation of additional conditions. It employs one or more supplementary UNet models that work alongside the Stable Diffusion model. These UNet models process both the input prompt and the image concurrently, with results being merged back in at each step of the UNet up-stage.
TBD
Position Control using the ControlNet
ControlNet provides finer control for precise adjustments. For example, it is possible for ControlNet to generate an image that replicates a specific pose from another image that the out-of-the-box Stable Diffusion model cannot achieve:
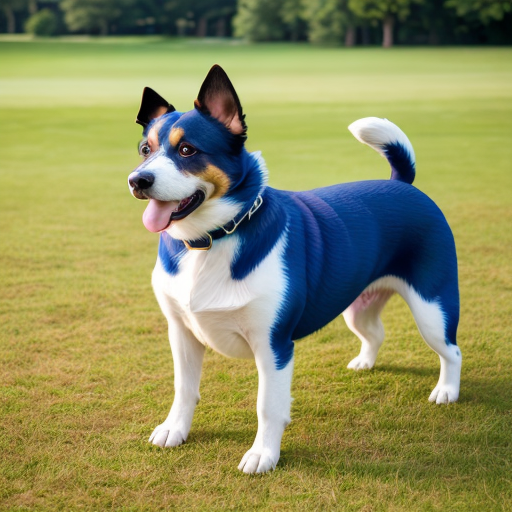
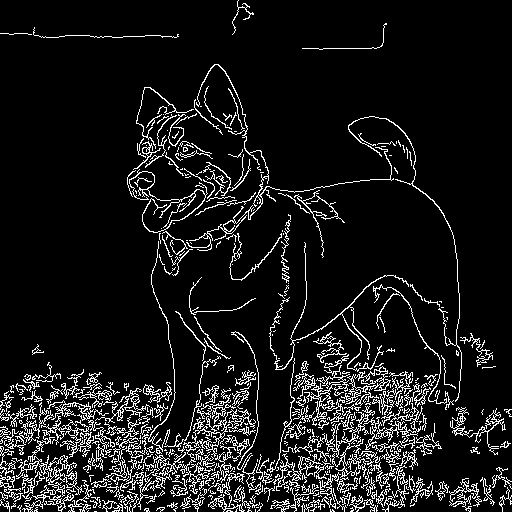
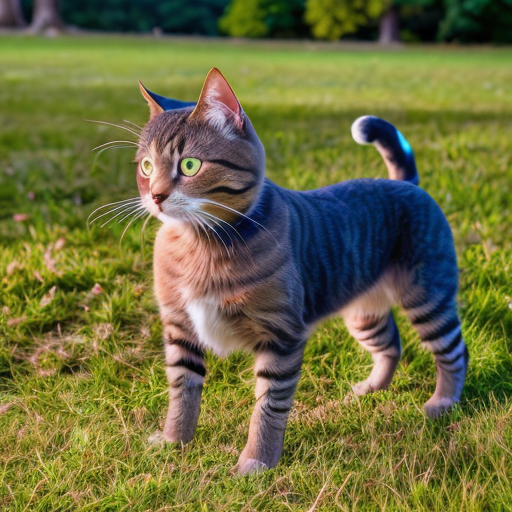
In the example above, we extracted edge information from the original photo and used it as a control image in the ControlNet pipeline. This allowed the generated image to replace the dog with a cat while preserving the dog’s original pose, thanks to the edge guidance.
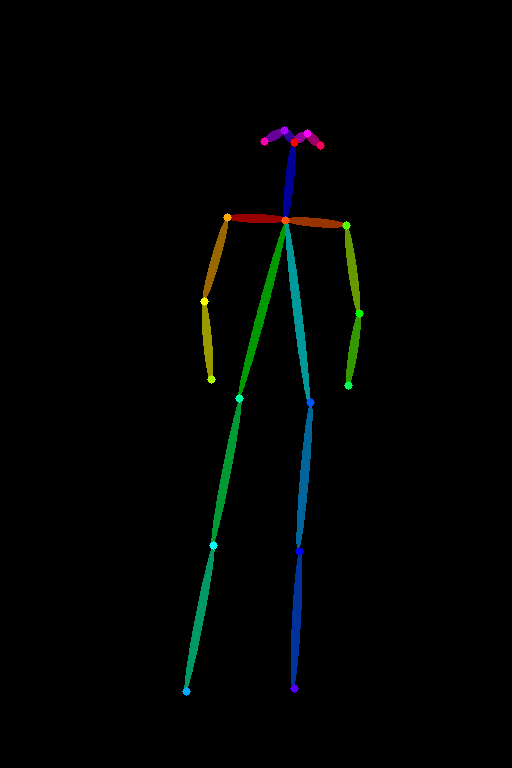
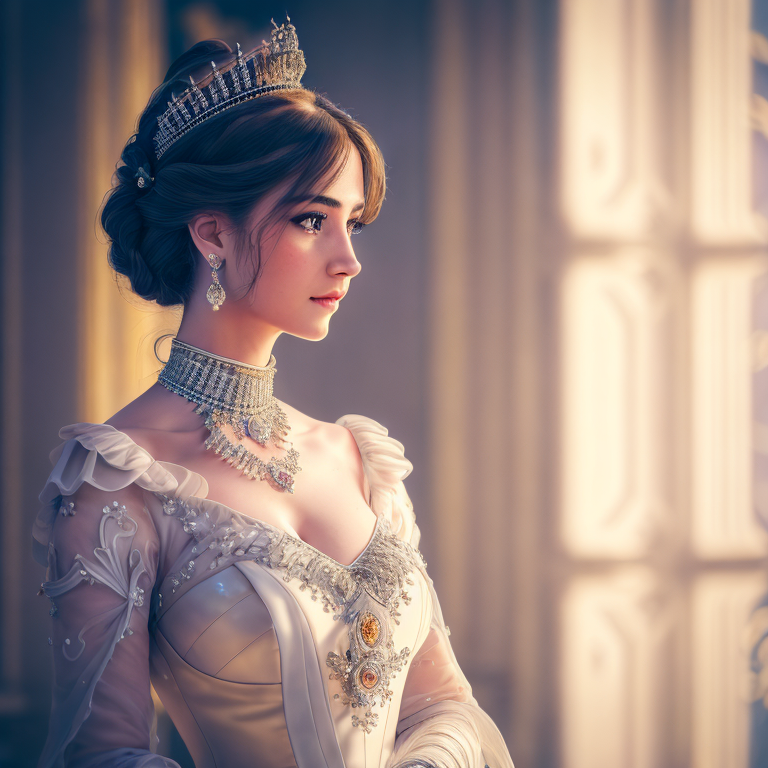
Similarly, with the recent advancements in SDXL, we can extract pose information from a human body and transfer it to another person.
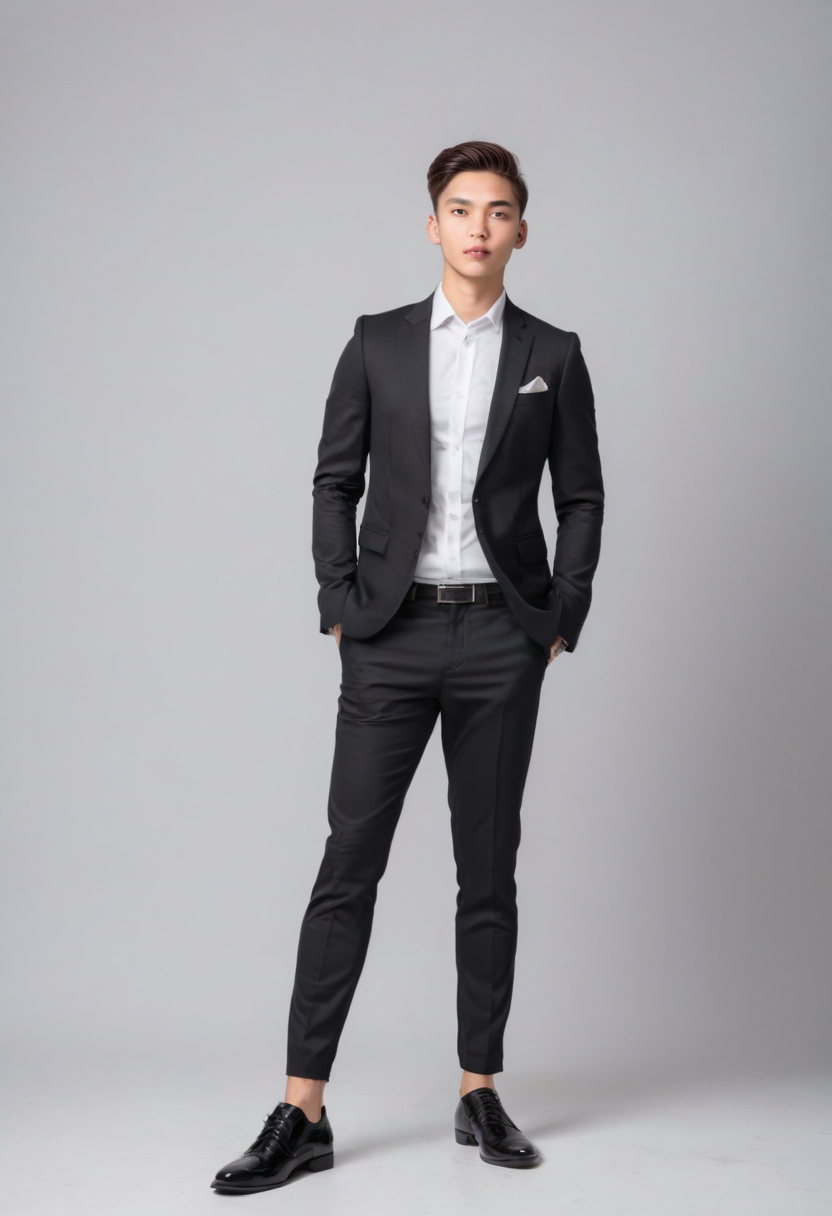
Note that the ControlNet models will only work with models using the same base model. A SD v1.5 ControlNet model works with all other SD v1.5 models. For SDXL models, we will need a ControlNet that is trained with SDXL. This is because SDXL models use a different architecture, a larger UNet than the SD v1.5.
ControlNet Tile
Compared with the img2img approach, ControlNet yields better outcomes. Among the ControlNet models, the ControlNet Tile stands out for its ability to upscale images by introducing substantial detail information to the original image.
# load the ControlNet model
controlnet = ControlNetModel.from_pretrained(
    "takuma104/control_v11",
    subfolder=  'control_v11f1e_sd15_tile',
    torch_dtype = torch.float32,
)

# upscale the image
cn_tile_upscale_img = pipeline(
    image = resized_raw_image,
    control_image = resized_raw_image,
    prompt = f"{sr_prompt}{prompt}",
    negative_prompt = neg_prompt,
    strength = 0.8,
    guidence_scale = 7,
    generator = torch.Generator("mps"),
    num_inference_steps = 50
).images[0]
Here we use the raw resized image as both the initial diffusion image and the ControlNet start image (control_image). The strength controls the influence of ControlNet on the denoising process.
Let’s use this prompt to compare the results between the generated raw image and the refined the image:
A stunningly realistic photo of a 25yo women with long, flowing brown hair and a beautiful smile.
upper body, detailed eyes, detailed face, realistic skin texture, set against a blue sky, with a few fluffy clouds in the background.
As you can see in the photos below, The ControlNet produces remarkable results
In the above example, the image-to-image approach would require multiple steps to achieve a desirable outcome. In contrast, ControlNet Tile accomplishes the same outcome with a single round of upscaling. Additionally, ControlNet Tile consumes relatively lower VRAM usage compared to the image-to-image solution.
If your goal is to preserve as many aspects of the original image as possible during the upscaling, the image-to-image approach would be a better option. Conversely, if you prefer an AI-driven, or a creative approach that generates new rich details, ControlNet Tile is a more preferable option.
Summary
| Control Method | Functioning Stage | Usage Scenario |
|---|---|---|
| Textual Embedding | Text encoder | Add a new style, a new concept or a new face |
| LoRA | Merge LoRA weights into the UNet model (and the CLIP text encoder, optional) | Add a set of styles, concepts, and generate content |
| Image to Image | Provide the initial latent image | Fix images, or add styles and concepts to images |
| ControlNet | Participant denoising together with a checkpoint model UNet | Control shape, pose, content detail |